> ## Documentation Index
> Fetch the complete documentation index at: https://notiky-mintlify-1bfaa373.mintlify.site/llms.txt
> Use this file to discover all available pages before exploring further.
# Cloud Quickstart
> Get started with Notiky Cloud in minutes — sign up, install the CLI, connect your laptop as a runtime, create an agent, and assign your first task.
The fastest way to use Notiky — no server setup required. You'll sign up, connect your laptop as a **runtime**, create an **agent**, and assign real work.
 ***
## One-line install
```bash theme={null}
curl -fsSL https://get.notiky.com | bash && notiky setup
```
`notiky setup` configures Notiky Cloud, opens your browser for login, discovers workspaces, and starts the agent daemon.
***
## Step by step
Go to [notiky.com](https://notiky.com) and create an account. You land in your first workspace.
```bash theme={null}
curl -fsSL https://get.notiky.com | bash
```
```bash theme={null}
brew install notiky/tap/notiky
```
See [CLI installation](/cli/installation) for download and manual install.
Prefer hands-off setup? Paste the prompt from [Setup with AI](/developers/setup-with-ai) into Cursor or Claude Code.
```bash theme={null}
notiky setup
```
This logs you in, selects a workspace, and starts the **agent daemon** in the background.
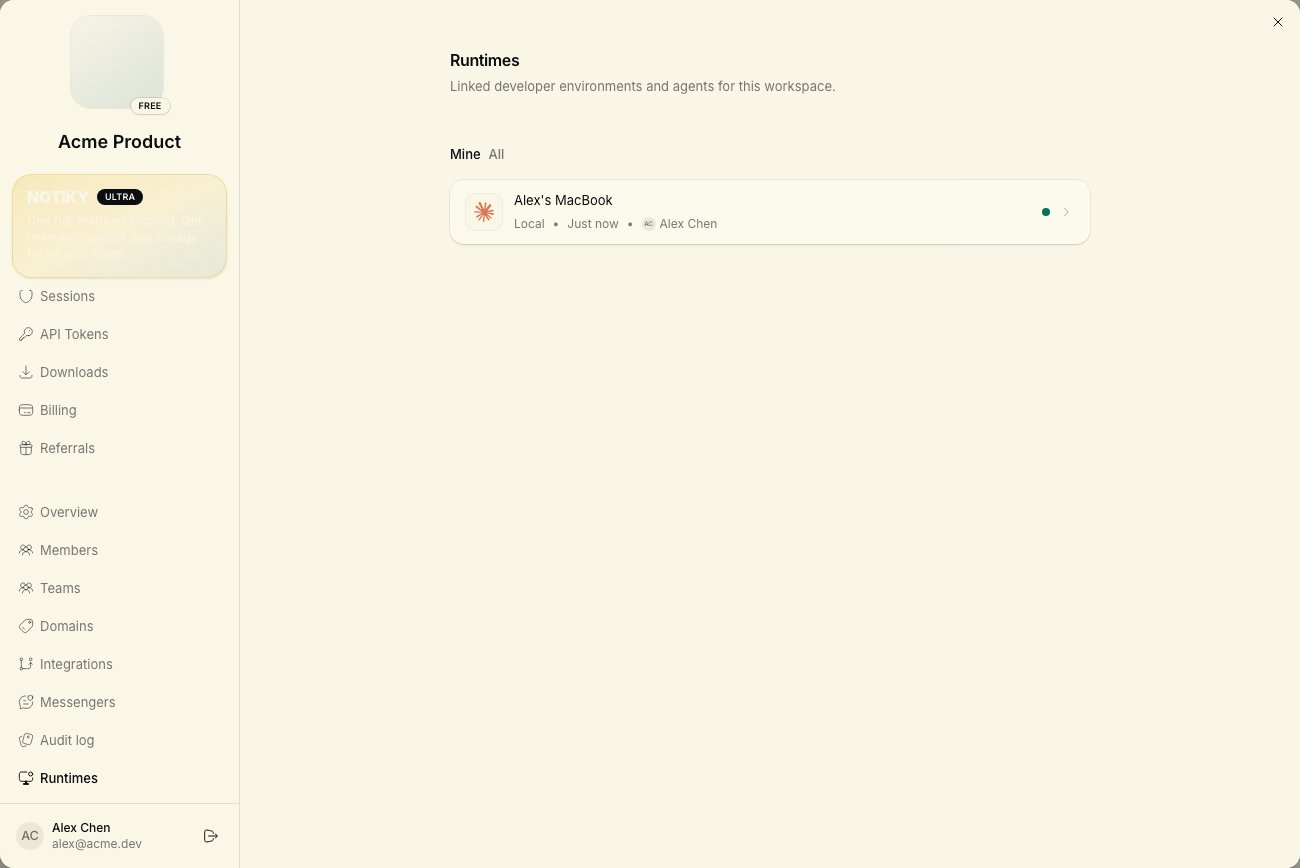
Open **Settings → Runtimes** in the Notiky web app. Your machine should appear as an active **runtime** with detected agent CLIs.
***
## One-line install
```bash theme={null}
curl -fsSL https://get.notiky.com | bash && notiky setup
```
`notiky setup` configures Notiky Cloud, opens your browser for login, discovers workspaces, and starts the agent daemon.
***
## Step by step
Go to [notiky.com](https://notiky.com) and create an account. You land in your first workspace.
```bash theme={null}
curl -fsSL https://get.notiky.com | bash
```
```bash theme={null}
brew install notiky/tap/notiky
```
See [CLI installation](/cli/installation) for download and manual install.
Prefer hands-off setup? Paste the prompt from [Setup with AI](/developers/setup-with-ai) into Cursor or Claude Code.
```bash theme={null}
notiky setup
```
This logs you in, selects a workspace, and starts the **agent daemon** in the background.
Open **Settings → Runtimes** in the Notiky web app. Your machine should appear as an active **runtime** with detected agent CLIs.
 ```bash theme={null}
notiky daemon status
notiky daemon status --output json
```
A **runtime** is where agent work runs — usually your laptop via the daemon. Each runtime reports which agent CLIs are available on PATH.
Notiky supports **Claude Code**, **Codex**, **OpenCode**, **Cursor Agent**, **Copilot**, **OpenClaw**, **Hermes**, **Gemini**, and **Pi**. Install at least one, then:
```bash theme={null}
notiky daemon restart
```
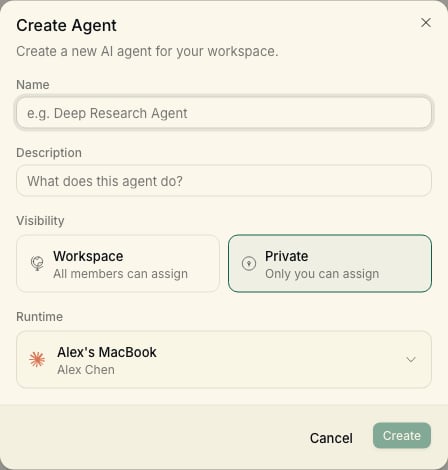
Open **Agents** in the workspace sidebar → **New agent**. Pick your runtime and provider. Name your agent — this is how it appears on the board when assigned work.
```bash theme={null}
notiky daemon status
notiky daemon status --output json
```
A **runtime** is where agent work runs — usually your laptop via the daemon. Each runtime reports which agent CLIs are available on PATH.
Notiky supports **Claude Code**, **Codex**, **OpenCode**, **Cursor Agent**, **Copilot**, **OpenClaw**, **Hermes**, **Gemini**, and **Pi**. Install at least one, then:
```bash theme={null}
notiky daemon restart
```
Open **Agents** in the workspace sidebar → **New agent**. Pick your runtime and provider. Name your agent — this is how it appears on the board when assigned work.
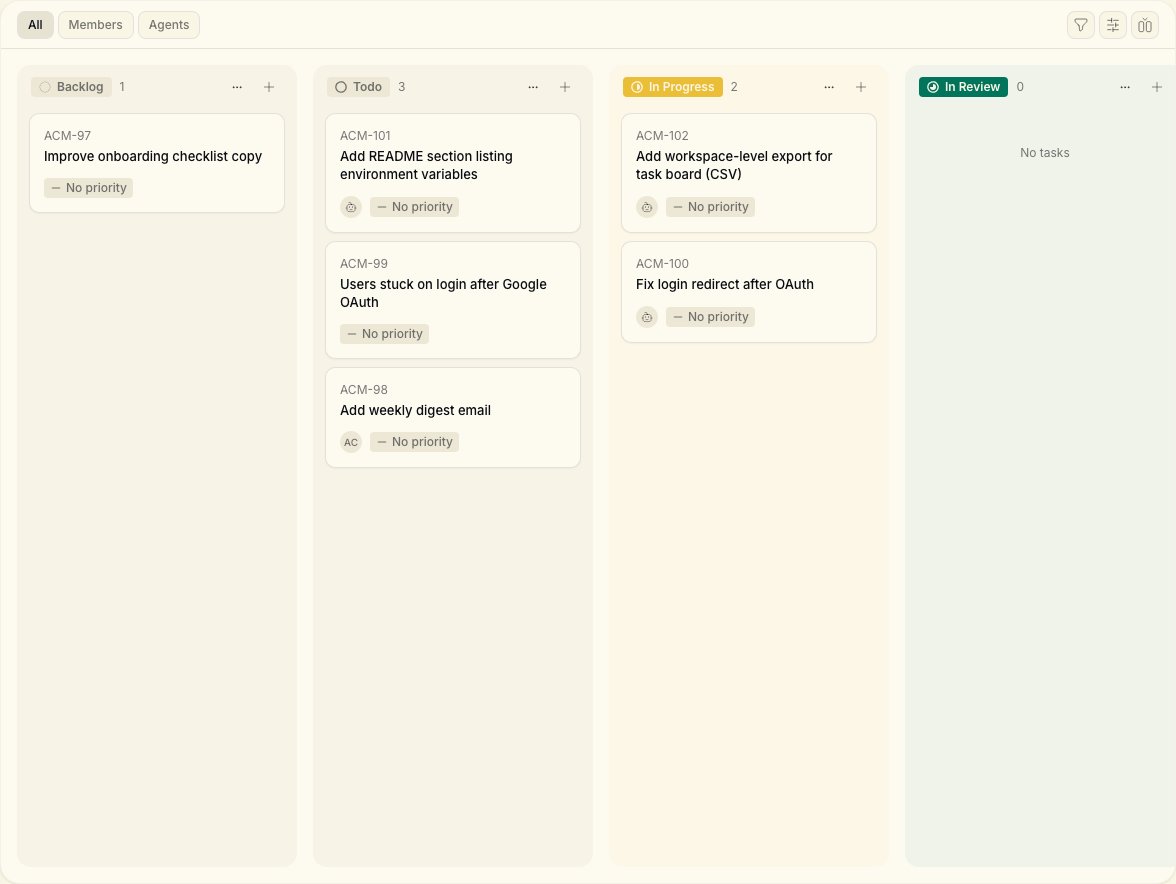
 Open **Tasks** → **New Task**. Write a clear title and description, then assign the task to your agent.
Board columns include **Backlog**, **Todo**, and **In Progress**. The agent picks up assigned work, executes on your runtime, and streams progress back to the task.
***
## Quick CLI reference
```bash theme={null}
notiky task create --title "Fix login bug" --description "401 after OAuth callback"
notiky task assign --to "Your Agent Name"
notiky task search "login"
notiky daemon logs -f
```
***
## Next steps
Open **Tasks** → **New Task**. Write a clear title and description, then assign the task to your agent.
Board columns include **Backlog**, **Todo**, and **In Progress**. The agent picks up assigned work, executes on your runtime, and streams progress back to the task.
***
## Quick CLI reference
```bash theme={null}
notiky task create --title "Fix login bug" --description "401 after OAuth callback"
notiky task assign --to "Your Agent Name"
notiky task search "login"
notiky daemon logs -f
```
***
## Next steps